
Rating: Easy
Supplies: Large Boxes to make a tunnel, or a premade tunnel. Tape to cover doorways, connect boxes. Someway to provide support or stability to the box so they stay as a tunnel.
The tunnel is a nice addition to any trap. It’s a great way to start for toddlers, but is equally fun for the later ages. Forcing the kids to get down on the ground and shimmy through a long, small space is sure to make them feel they are part of the mission impossible team.
We set our tunnel coming out of a door. This made it easy to use cardboard to block the rest of the doorway forcing them into the tunnel. This is an important step; wherever you put your tunnel, make sure they cannot get around it.

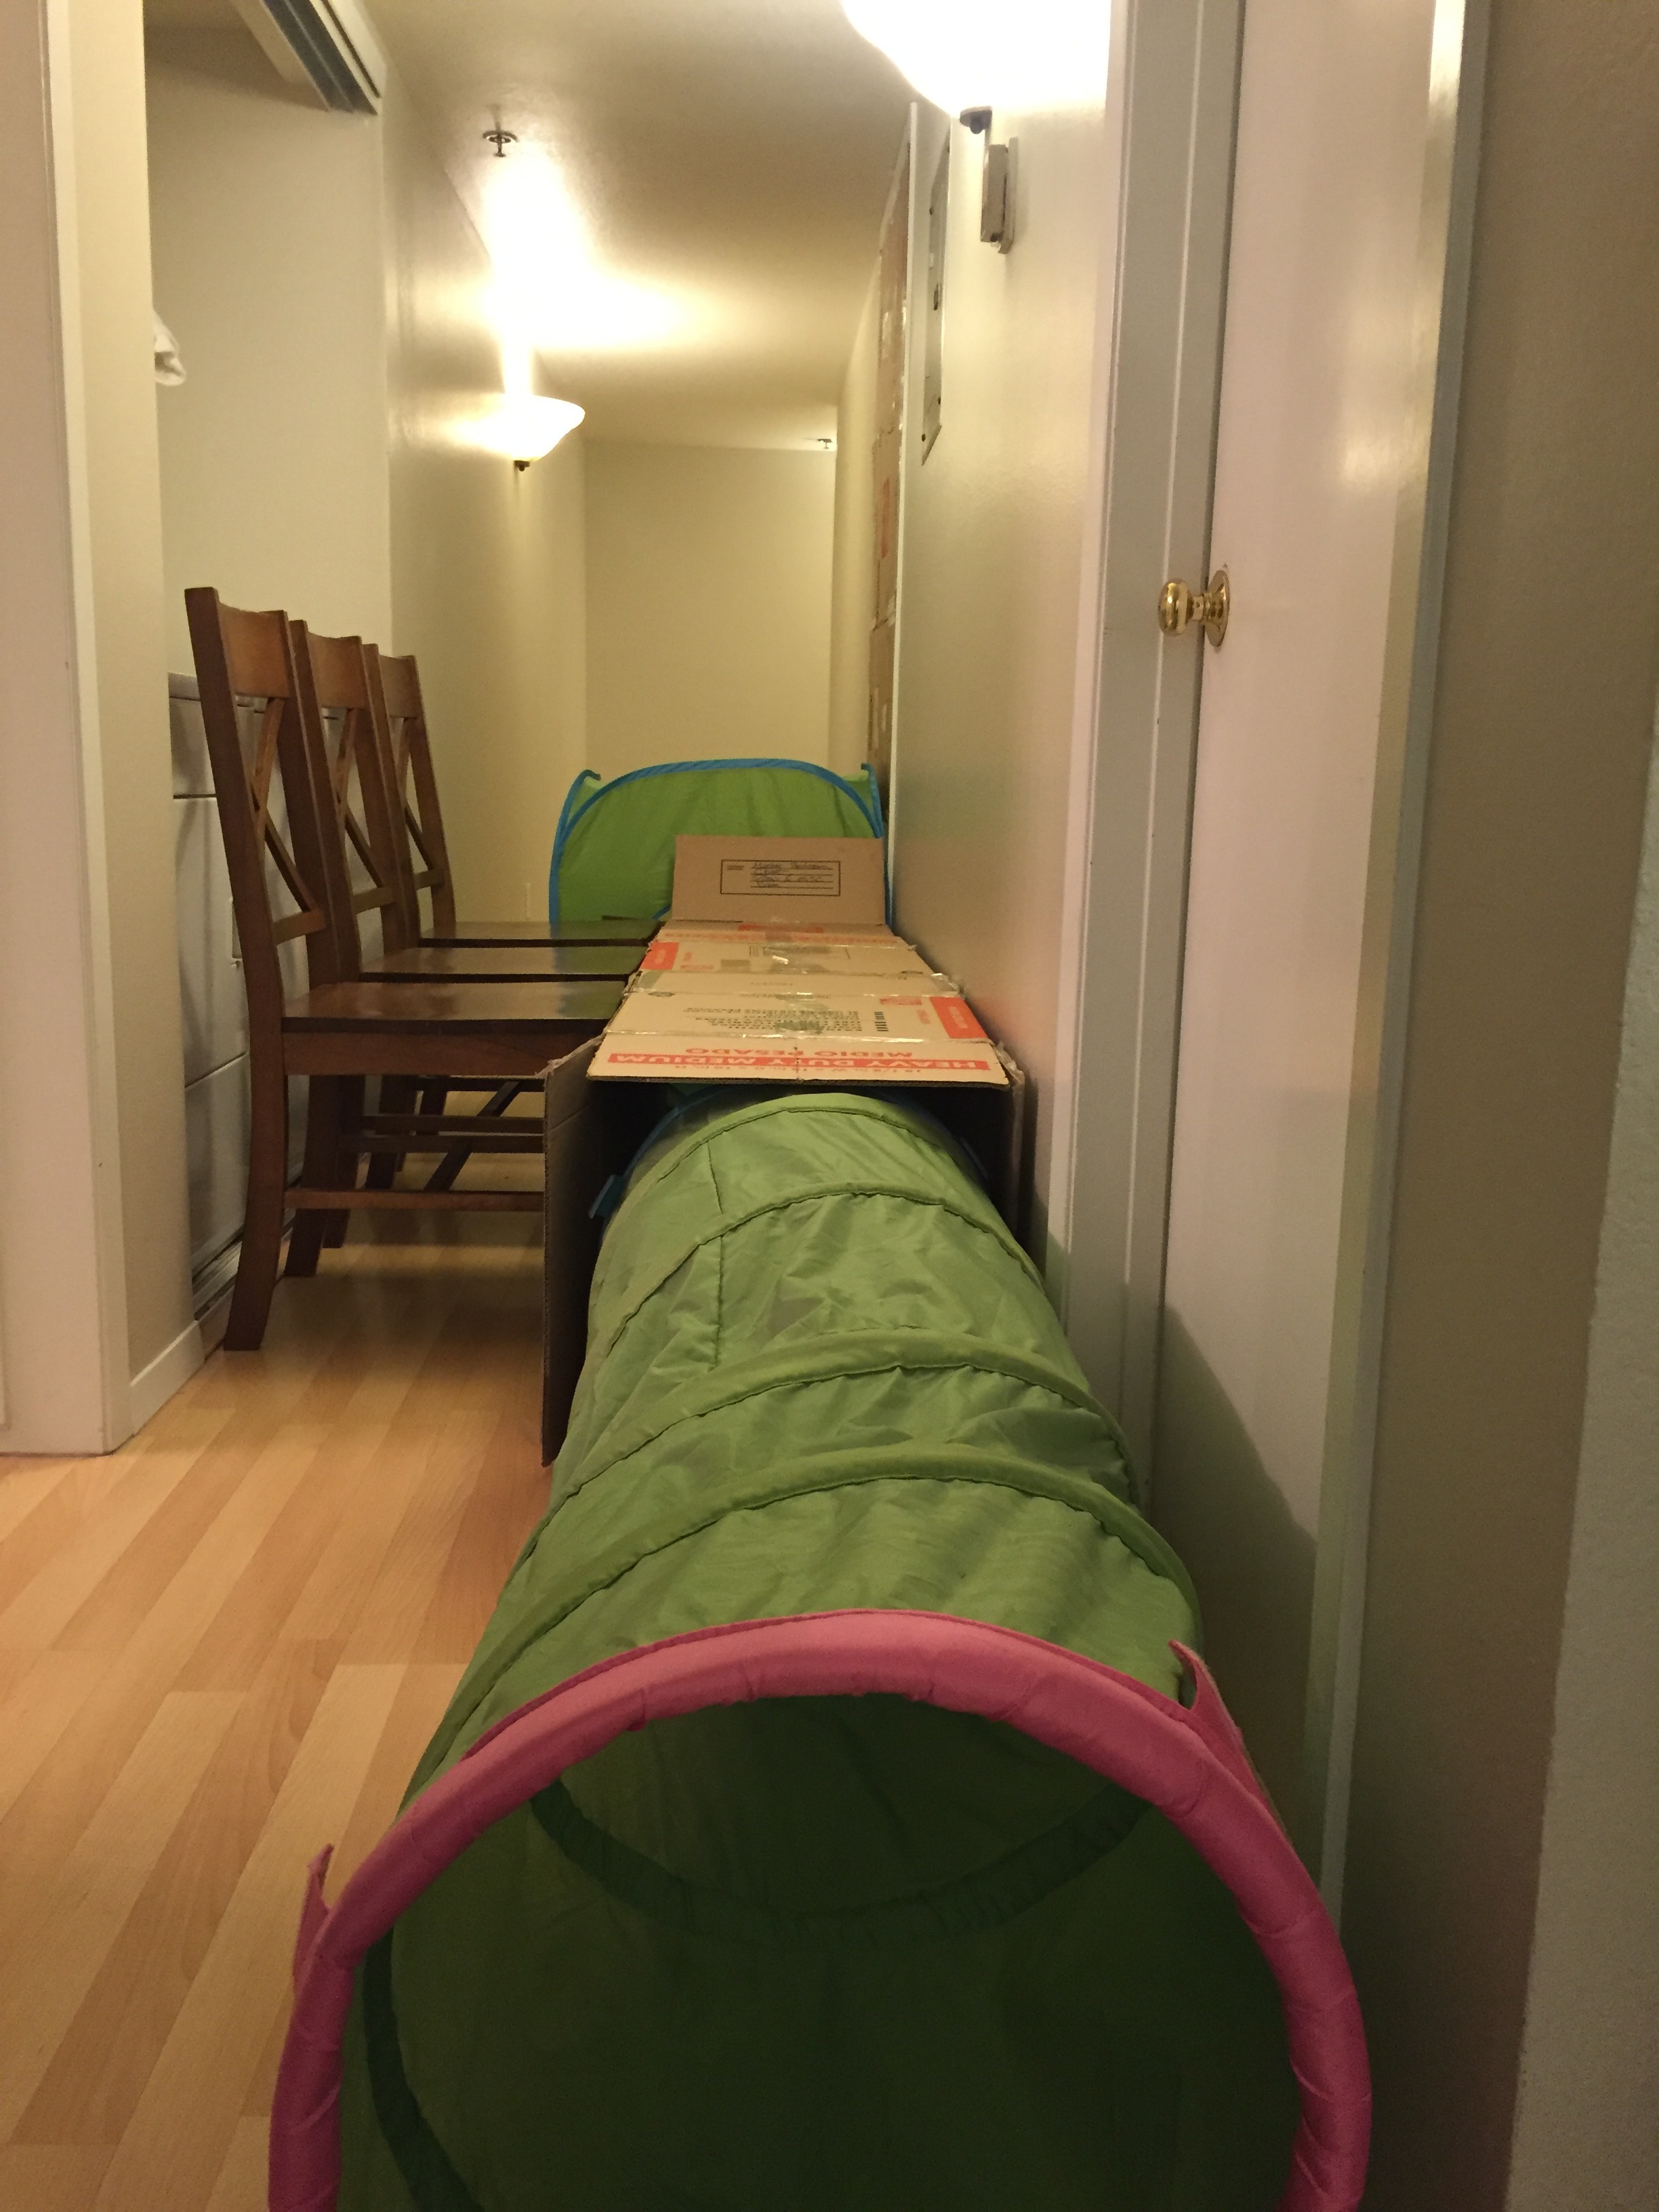
The pre-made tunnel (which could be purchased here) we used has a hole for them to enter from the bedroom, and another hole for them to exit leading down the hall, so we didn’t have to create a turn using boxes.
If using boxes, you may need to stabilize the sides. We used chairs on one side and the wall on the other to support the boxes so they didn’t collapse.
Get creative with this the inside the tunnel. You could do something to trick or scare them or another obstacle they must work their way around. Consider where the tunnel could lead, could you safely put it down a very short staircase so it becomes a tunnel slide?
To make this obstacle easier...
1. Shorten the length of the tunnel.
2. Use bigger boxes for more space to crawl through.
To make this obstacle more difficult....
1. Longer tunnel.
2. Smaller boxes, a tight squeeze to crawl through.
3. Have obstacles inside the tunnel. Crawling too quickly may set them off – cup tower tipping, dangling jingle bells ringing.
We look forward to hearing your ideas on how you plan to use tunnels!